Automate MailChimp Lead Imports From MySQL
Arc seamlessly links your MySQL database to your MailChimp account, making it easy to automate manual tasks, such as creating new Leads when new users sign up. The following sample project demonstrates how different ports in Arc are used to automatically export MySQL data and store them as new Leads in MailChimp.
Drop in the Sample Project
To get started with the sample, download and install Arc (free 30-day trial). Then download the sample project and extract and copy the contents to the "data" folder in the installation location for Arc. For Windows installations, this will likely be C:\Program Files\CData\Arc. Please consult the documentation for the Java build of Arc for Linux/Unix/Mac installations.
Prepare the MailChimp and MySQL Tables for Data Transfer
Before you start, make sure you have identified the MailChimp destination table column requirements so you don't stumble upon any errors during insertion. For demonstration simplicity, you can use the following MailChimp/MySQL table format and column values.
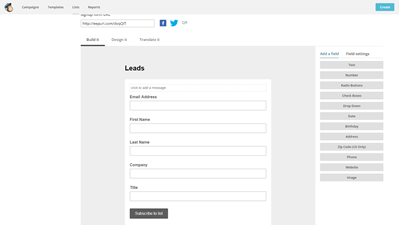
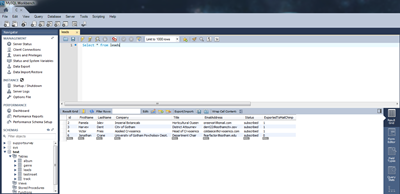
Note that the Status column is required by the MailChimp API, and you will need the ExportedToMailChimp column later in this demo.
Poll MySQL for New Leads
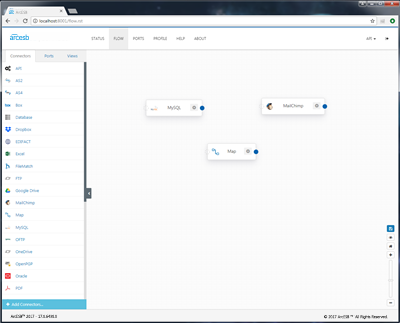
To initiate the MySQL-MailChimp data integration, drag and drop the MySQL, MailChimp and Map Ports into the Arc Flow. You can skip this step if you're using the sample project.
Connect to MySQL and Add Output Mappings
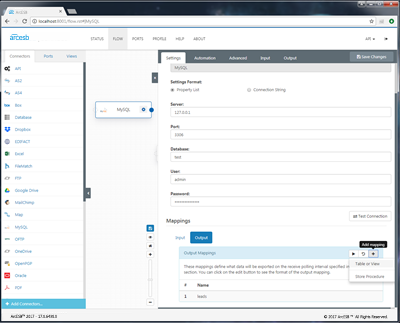
Click the MySQL Port and input the necessary credentials so you can successfully connect to the database.
To specify the MySQL table and the columns you want to insert into MailChimp, you need to add the Output Mappings in the Mappings section of the Port.
Run the Template
When the Mapping is specified, click the 'Execute All Templates' button to create the .xml files corresponding to your MySQL data.
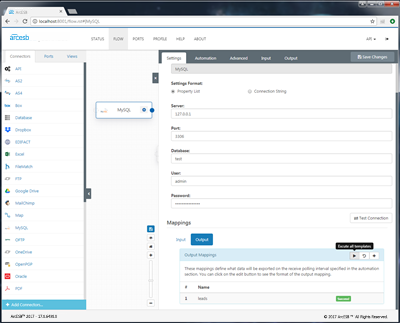
The application generates XML files for all the Leads processed in MySQL, so the Leads can be inserted into MailChimp.
Connect to MailChimp and Configure the Input Mappings
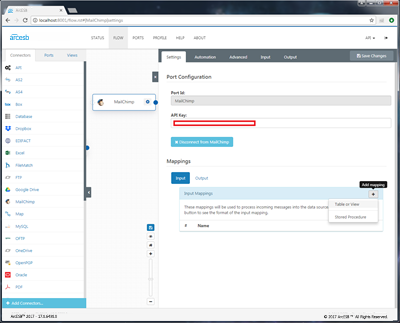
The next step is to configure the MailChimp connection and specify the table where you want to insert MailChimp Leads.
To connect to MailChimp, click the MailChimp Port and input the API Key, which you can find by selecting your profile in the MailChimp UI -> Account -> Extras -> API Keys.
Once the connection is successful, click the 'Add Mapping' button in the Input tab of the Mappings section to select your table and its columns.
Preventing Duplicate Exports
You can avoid duplicate records in the destination table by setting a column in the MySQL database to mark that the Lead is exported to MailChimp. This is the ExportedToMailChimp column mentioned above. After this column is created, you can include a WHERE clause in your table mapping to return only records that were not previously exported.
You can also set a second special mapping that acts as an UPDATE clause to overwrite this column to 'true' or '1' for the exported record. Keep in mind, the table administrator is responsible for updating the column if they want that record to be exported again.
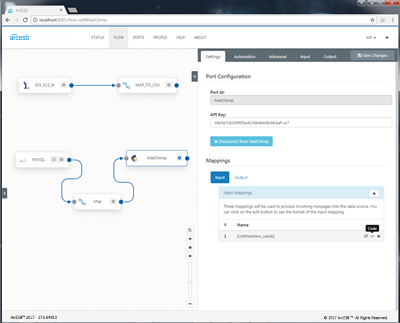
To perform this configuration, click the Code button in Input Mappings to access the input mapping for your Leads table.
Add a special instruction to update the ExportedToMailChimp column. Here's an example:
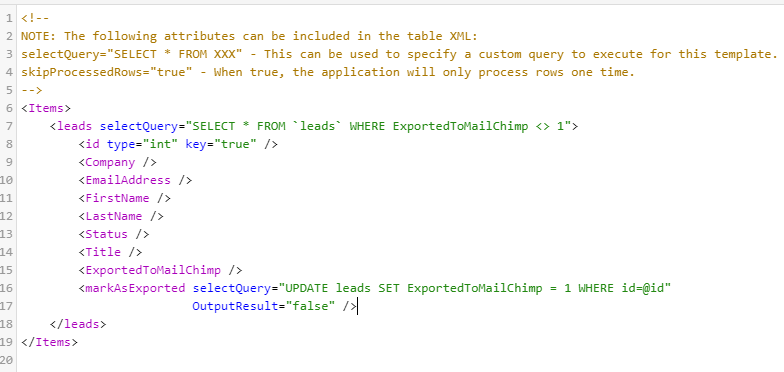
NOTE: The OutputResult="false" attribute of the MarkAsExported query is an instruction to the connector to execute the query without pushing the results of the query to an outbound message. This is used to set a marker in the source table when a Lead has been exported.
Insert MySQL Data into MailChimp
The setup of the data providers is now complete, all that is left is the configuration of the Map Connector.
Configure the Map Connector
Once the source and destination are specified, the Mappings table will expand, and you can choose which column in MySQL corresponds to each column in MailChimp. You will notice the Mappings fields in the Designer will also be automatically populated if the Source Field column has the same name as the Destination Field column. If not, you will have to manually pick them (e.g. FirstName and First_Name have different names and are not automatically linked).
Send the Data
After you confirm the mapping, you can go to the Input tab of the Map Port, pick the Unsent .xml files generated and click the Send button.
You have now successfully created new Leads in MailChimp by automatically utilizing your MySQL data.
More Information & Next Steps
For more information on Arc, visit our homepage. Download your free, 30-day trial and take control of your business document exchange today!
Download & Install Sample
Already running Arc? This sample will setup Arc with the data and connector configurations referenced in this article:
